The thing that hath been, it is that which shall be; and that which is done is that which shall be done: and there is no new thing under the sun.
Ecclesiastes 1:9 (KJV)
Running Live means your computer will use C4C Ubuntu on the media (USB key, SD Card or DVD) it booted from – allowing you to safely explore the operating system, test hardware and networks, download and upload files – all without making any permanent changes. Use examples include safely browsing the Internet without storing any cookies or history, trying out software before installing it, and rescuing data from an otherwise unusable machine.

How to Startup Your Computer from C4C Ubuntu
Enter the BIOS / UEFI / Configuration / Setup / Boot Menu to tell your computer to boot from other media (USB key, SD Card or DVD). In case you need it for anything, the Live password is c4c 24.04
How to Enter the Menu
If how to enter this menu isn’t known, doesn’t show, goes by too fast, or is covered by a logo; try tapping the [ESC], [DEL], [F1], [F2], [F11], [F12] or [Backspace] key while starting up. Lifewire has a fairly comprehensive BIOS Access Key List Here. Also, in UEFI, you may need to disable Secure Boot and / or enable Legacy Boot.

Some older UEFI computers will need you to help it navigate to the EFI file
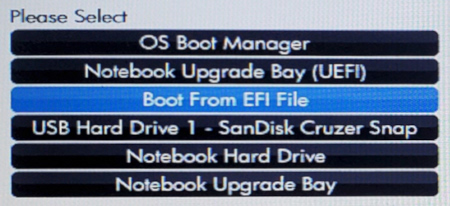

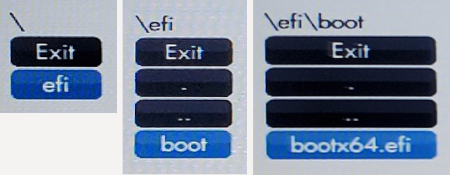
Booting an Intel Mac from a USB Key
1. Insert a USB Key (or a USB SD Card Reader) in an open USB port
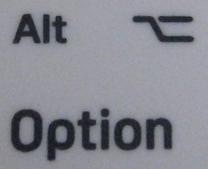
2. Boot and press and hold the [Option] key until you see the Startup Screen
[Option] is typically between [Control] and [Command] and may be labeled [Option], [Opt], [Alt], and/or by it’s symbol [⌥]
3. Select EFI Boot by moving the arrow to point to the USB Key (or USB SD Card Reader) In the Startup Screen

The Boot Screen allows you to choose Live/Installation Mode, Safe Mode, Text Mode or Boot from Local. Older computers with a BIOS will only give you 10 seconds to choose an option and if nothing is selected, you’ll automatically boot into a Live session. In case you need it for anything, the Live password is c4c 24.04
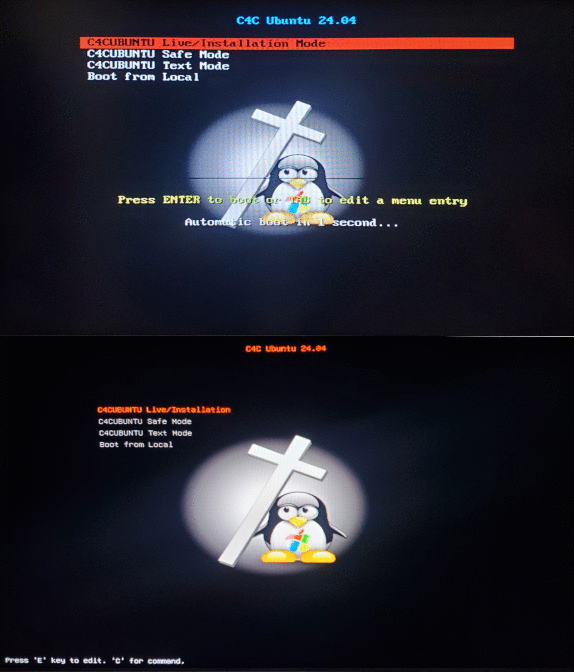
Running live allows you to experience C4C Ubuntu as if you had already installed it. All the included software and Christian content run (albeit a bit slower) just like the real thing. If / when you’re ready to permanently install C4C Ubuntu, see one of the Installers below:
GUI Installer
Choose Install System from the System Menu or double-click the Desktop launcher. This will open Calamares; a sleek, modern, distribution-independent system installer with a Graphical User Interface (GUI).
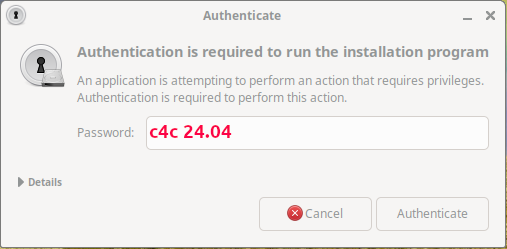
Provide the password: c4c 24.04
Instructions
Choose American English or British English (other languages have been removed). Select your timezone/location. Choose your keyboard / language / model / layout. Install alongside another OS (if one is present), Replace a partition, Erase disk or Manual partitioning. Also choose Swap to File or No Swap and the ext4 (recommended for most users) or btrfs file system. Fill out the following form with your Name, your Login Name, your Computer Name, a Password / Passphrase (twice) and decide if you’d like to log in automatically. Get an Overview of what will happen when installation begins. One last opportunity to make any final changes before installation. Click the [Install now] button to begin the installation and watch a short looping slideshow. All done. Clicking the [Done] button while leaving the Restart now check box checked will reboot the computer.
Remove the installation media (DVD, SD Card, USB Key) after the C4C logo appears and disappears – when the screen is black.

Note: If the GUI installer fails, use the CLI Installer
CLI Installer
Choose the krill Command Line Interface (CLI) Installer from the System Menu.
Instructions
Provide the live password: c4c 24.04 and hit [Enter] on your keyboard. In most cases, you’ll want to install on /dev/sda/ Choose > No if you need to change the info shown inside the box and > Yes to confirm the info or the changes you made. C4C Ubuntu is only in English (other languages have been removed), so your choices in krill are en_AU.UTF-8 (Australia), en_CA.UTF-8 (Canada), en_GB.UTF-8 (Great Britain) or en_US.UTF-8 (United States). Select your timezone by choosing your continent, then a major city or region near you (or in your timezone). Choose your keyboard type (model and layout). Next it’s time to pick a username, Full Name, password(s) or passphrase(s) and your computer’s name. Make any needed changes to your network data. Confirm your selections and install. A couple of progress bars and percentage readings will let you know roughly how long it will take. When Krill is finished, it will let you know to Press a key to reboot the computer.
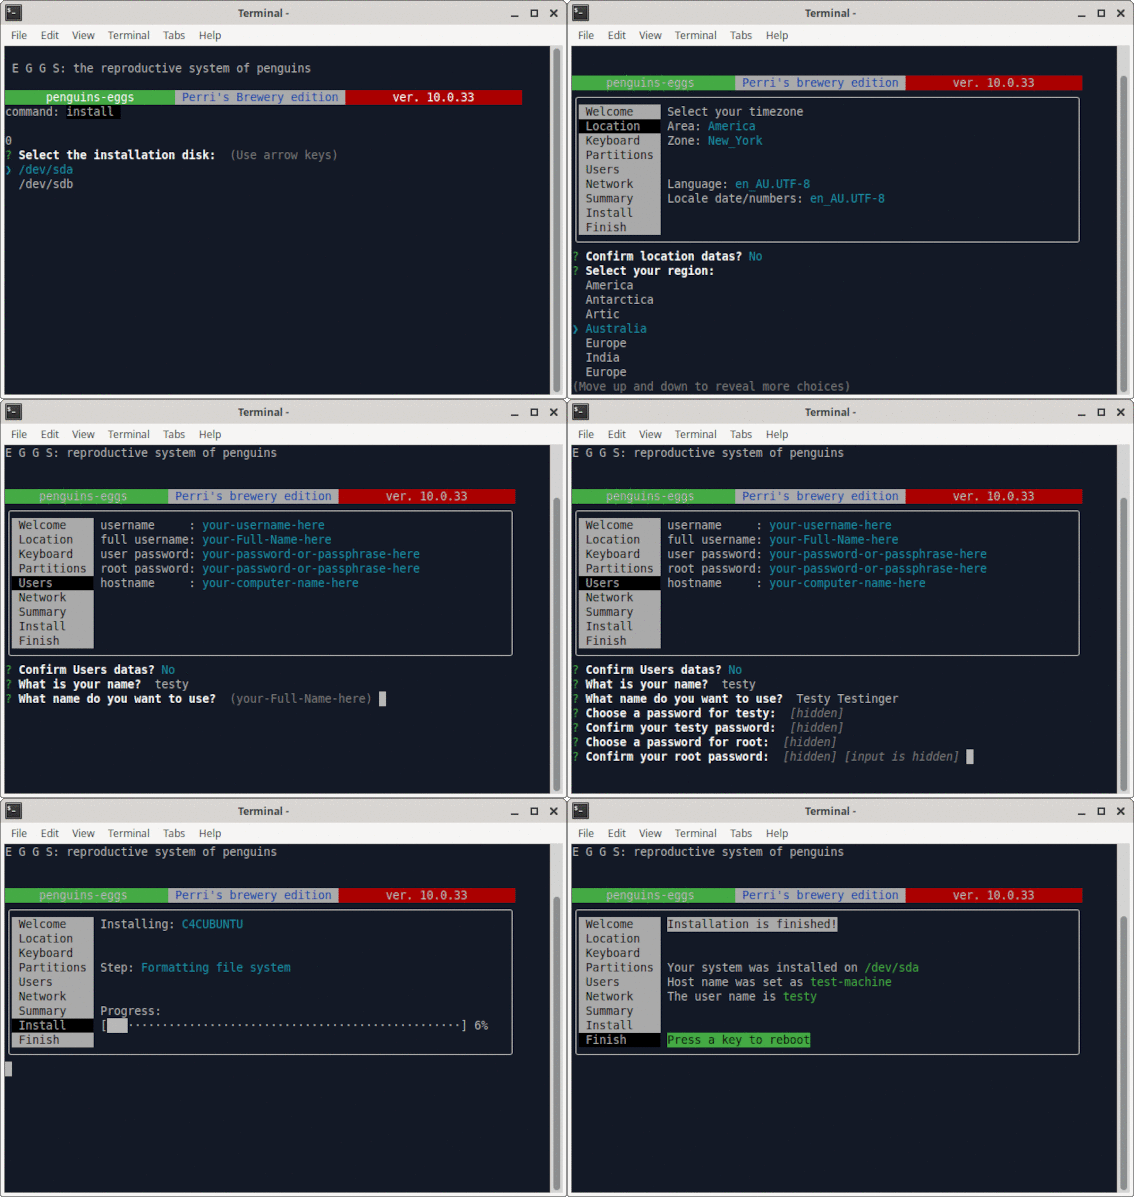
Remove the installation media (DVD, SD Card, USB Key) after the C4C logo appears and disappears – when the screen is black.

Note: If the CLI Installer fails, use the Text Mode Installer
Text Mode Installer
Boot or reboot from your installation media (USB Key, SD Card or DVD) and choose C4CUBUNTU Text Mode.
Instructions
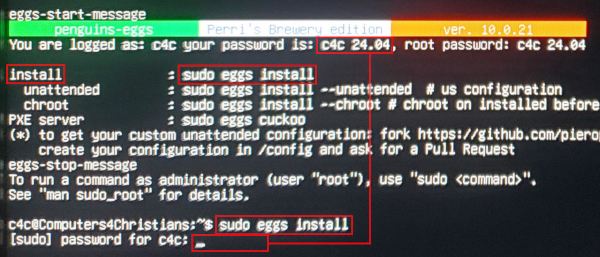
At the Command Prompt $ type sudo eggs install, hit [Enter], provide the password (you won’t see it) c4c 24.04 and hit [Enter] again. From then on, follow the instructions above for the CLI Installer
Dual Boot Install
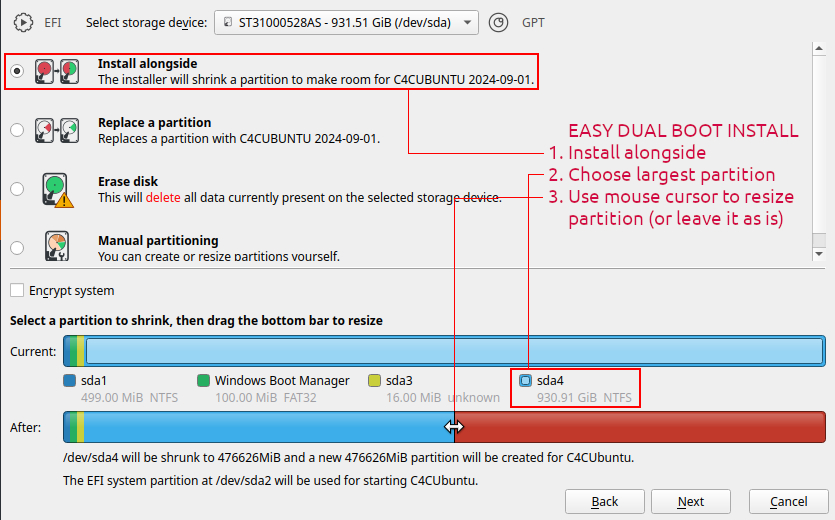
If you’ve already got another operating system that you’d like to keep, you can install C4C Ubuntu alongside it
Instructions
1. Click the radio button for Install alongside
2. Choose the largest partition
3. Use the mouse cursor to resize the partition (or leave it as is)
4. Follow the instructions for the GUI Installer
More Information
Once C4C Ubuntu is installed, the GRUB Boot Loader will let you choose which Operating System (OS) you’d like to boot into. You’ll boot into Ubuntu by default – but you’ll have 10 seconds to move to another option using the arrow keys on your keyboard. From there, you can again move to yet another selection, or even back to Ubuntu. Hit the [Enter] key when you’ve made your choice. Note: this means when doing something that requires a restart, you’ll need to be in close proximity to your computer to ensure it reboots into the same OS.

Other Notes:
The live system includes 4 different disk utilities that can prepare your (HDD or SSD) drive; mkfs, Parted, fdisk and GParted. There are several bookmarks to how-to guides for each in the included Firefox Web Browser under Disk Management.
To install on a Microsoft Surface
